How to Set Up a Product Photography Studio at Home
A home studio for product photography doesn't require a spare room or expensive gear. It requires a repeatable setup. Here's how to build one that produces professional, consistent results across every product you shoot.
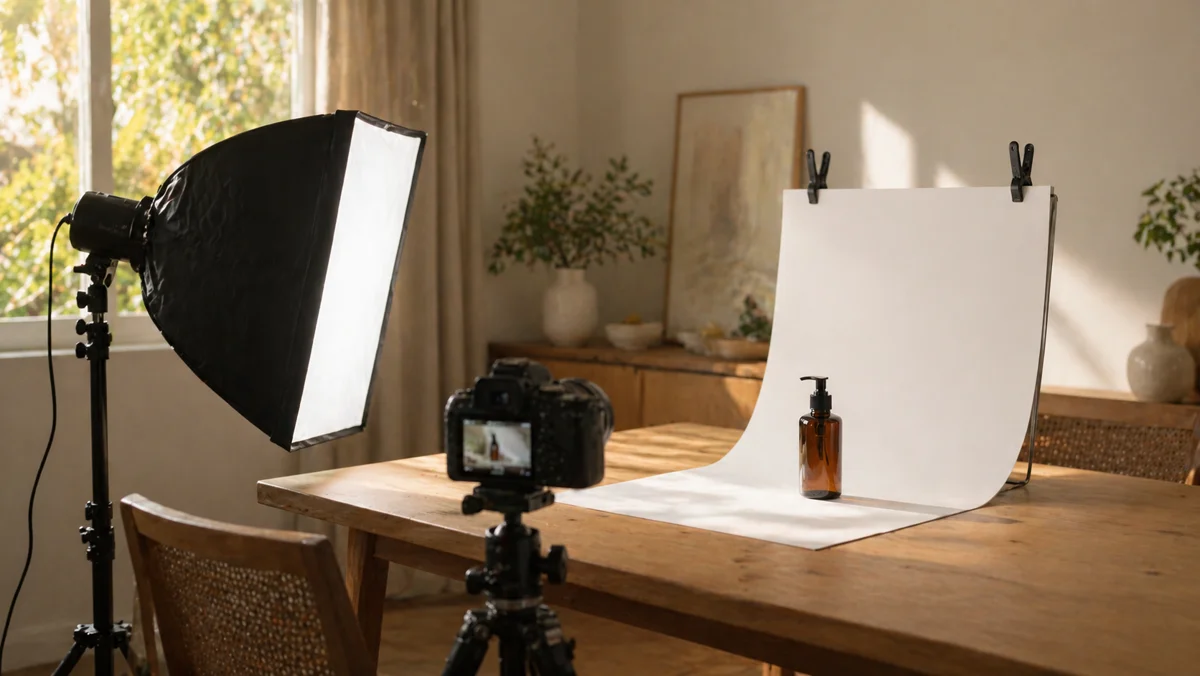
A studio is just a room where the variables are controlled. Light is predictable. The background doesn't change between shots. The camera always sits at the same height. That's it. Once you understand a studio as a repeatable system rather than a place, building one at home stops being intimidating.
The goal isn't to recreate a commercial studio in your spare bedroom. The goal is to control the same variables a commercial studio controls, in whatever space you have, with whatever budget you have.
Here's how to set up a home studio that produces consistent, professional product photos, and what's actually worth spending on versus where you can shortcut without losing quality.
Choosing the space
You don't need a dedicated room. You need a corner that meets three criteria: large enough to hold your setup, reachable for natural light or controllable for artificial light, and consistent enough that you can return to it and reproduce the exact same conditions.
- A 2m × 2m area is enough for products up to medium size; larger products may need a 2m × 3m footprint
- A north-facing window provides the most consistent natural light throughout the day
- A blank wall behind the product simplifies the background; if not, plan for a backdrop
- Stable temperature and humidity matter for products that fog, melt, or condense (cold drinks, candles, frozen goods)
💡 Pro tip
Mark the position of your tripod, table, and backdrop with tape on the floor. Even a few centimeters of drift between sessions changes the framing and makes the catalog look inconsistent. Tape removes the guesswork.
The backdrop: cheaper than you think, more important than you think
The backdrop does most of the heavy lifting in a home studio. A clean, smooth, dust-free backdrop produces professional-looking photos. A wrinkled, marked, or low-quality backdrop ruins photos no amount of editing can save.
- Vinyl seamless backdrop: durable, wipes clean, $40–80 for a sheet that lasts years
- Paper seamless: classic studio choice, available in dozens of colors, $30–60 per roll
- Foam core or poster board: $5–15, perfect for small products and small spaces
- Fabric backdrops: usable but prone to wrinkles, harder to keep clean than vinyl or paper
For most home setups, a curved sweep, where the backdrop comes down vertically and curves smoothly onto the table surface, is the cleanest look. It eliminates the visible line where wall meets table, which is the single most obvious tell of an amateur setup.
💡 Pro tip
Roll your backdrop up between sessions and store it vertically. Folding creates creases that show up under any directional light and require either steaming or tedious post-processing to remove.
Lighting: the variable that earns the most investment
Light is what separates a home studio from a phone snapshot. Of all the variables in product photography, lighting is the one where investment produces the most visible improvement in output.
Natural light setup
A north-facing window on an overcast day is the most flattering free light you can get. Diffuse, directional, and consistent for several hours. Position the product side-on to the window with a white foam board on the opposite side to bounce fill light back into the shadows.
Artificial light setup
For repeatable results year-round, two softboxes at 45 degrees from the product (key light and fill) cover most product categories. A budget setup runs $150–300 for two LED softboxes, stands, and modifiers. A professional setup runs $500–1500 with strobes and proper modifiers, and you'll notice the difference on glossy or reflective products.
Color temperature consistency matters more than light source quality. Mixing daylight, tungsten room light, and LED softboxes in the same shot creates color casts that are difficult to correct in post. Pick one source and turn the rest off.
Camera, tripod, and the gear that actually matters
The camera itself matters less than most beginners assume. A modern smartphone, a recent mirrorless, or a five-year-old DSLR all produce results good enough for ecommerce when the lighting and background are right.
- Tripod: non-negotiable, even cheap tripods fix the camera shake that ruins more photos than any other issue ($30–80)
- Remote shutter or self-timer: prevents the small movement that happens when you press the shutter button
- Manual settings: lock white balance, exposure, and focus so every shot in the session matches
- Color checker card: shoot one frame with a color reference at the start of each session for accurate post-processing
💡 Pro tip
Spend the camera budget on the tripod and the lights, not the body. A $200 phone on a $50 tripod under good light beats a $2000 camera handheld under bad light, every time.
Building a repeatable workflow
A studio that you set up fresh for every shoot will produce inconsistent results no matter how good your gear is. The whole point of a home studio is repeatability.
- Document your setup with photos: tripod position, light positions, camera settings, distances
- Lock your camera settings (white balance, ISO, aperture) and reuse the exact values for every session
- Use the same backdrop for the same product category every time
- Build a shot list for each product: hero, three-quarter, detail, scale shot, in-use
- Edit in batches with the same preset across the entire session
Consistency across SKUs is what separates a brand catalog from a collection of individual product photos. The setup matters less than the discipline of returning to the exact same setup every time.
When the home studio hits its limits
A well-built home studio handles 80% of ecommerce product photography needs. The remaining 20% is where home setups break down: lifestyle scenes that require a real environment, seasonal contexts that change every quarter, or marketing campaigns that need a dozen different settings for the same product.
This is the gap AI-generated scenes were built to fill. Your home studio produces the clean source photo. AI generation produces the lifestyle, seasonal, and contextual variations from that single source, in minutes, with consistent lighting and shadow integration. The home studio handles the controllable variables. AI handles the scaling.
💡 Pro tip
Treat your home studio as the foundation for clean source photos, not as the place every final image gets made. Source photos shot under controlled, consistent conditions are the highest-leverage asset you can produce, because they feed every downstream image, generated or otherwise.
Common questions about photography
Keep reading

April 29, 2026
Background Removal for Product Photos: When It Works, When It Doesn't
Background removal is the most common edit in ecommerce, and the one most often done badly. Here's when it actually works, where it falls apart, and how to get a clean cutout that doesn't undermine your listing.
Read guide
April 27, 2026
The Best Prompts for AI Product Images (And Why Most Don't Work)
Most AI product image prompts fail in the same way: they describe the product instead of directing the ad. Here's the prompt structure that consistently produces ad-quality output, and why the work disappears when the platform handles it for you.
Read guide